Saturday, June 28, 2025

Paper piecing


Put the wrong side of the fabric on the wrong side of the paper, making sure all of the area you are sewing is covered by both pieces of fabric.  It's better to have more than less fabric here, you can always trim away.
From the right side of the paper, put one or two pins along the line where you'll be sewing.
Flip your project back to see the right sides of the fabric.
Flip over the blue piece here, along the line that you've pinned.
Place another pin to keep this in place and then carefully remove the pins on the right side, and releasing the folded fabric to make it flat, adding more pins if needed.
Turn over and sew on the side, securing the stitches if it's in the middle of the block, back stitch if it's on an edge.
Trim away the extra fabric by folding the paper away to a 1/4 inch seam.


After you trim away the excess, fold the fabric back so that the right sides are showing and then press the seam to one side (to the darker fabric is preferred)
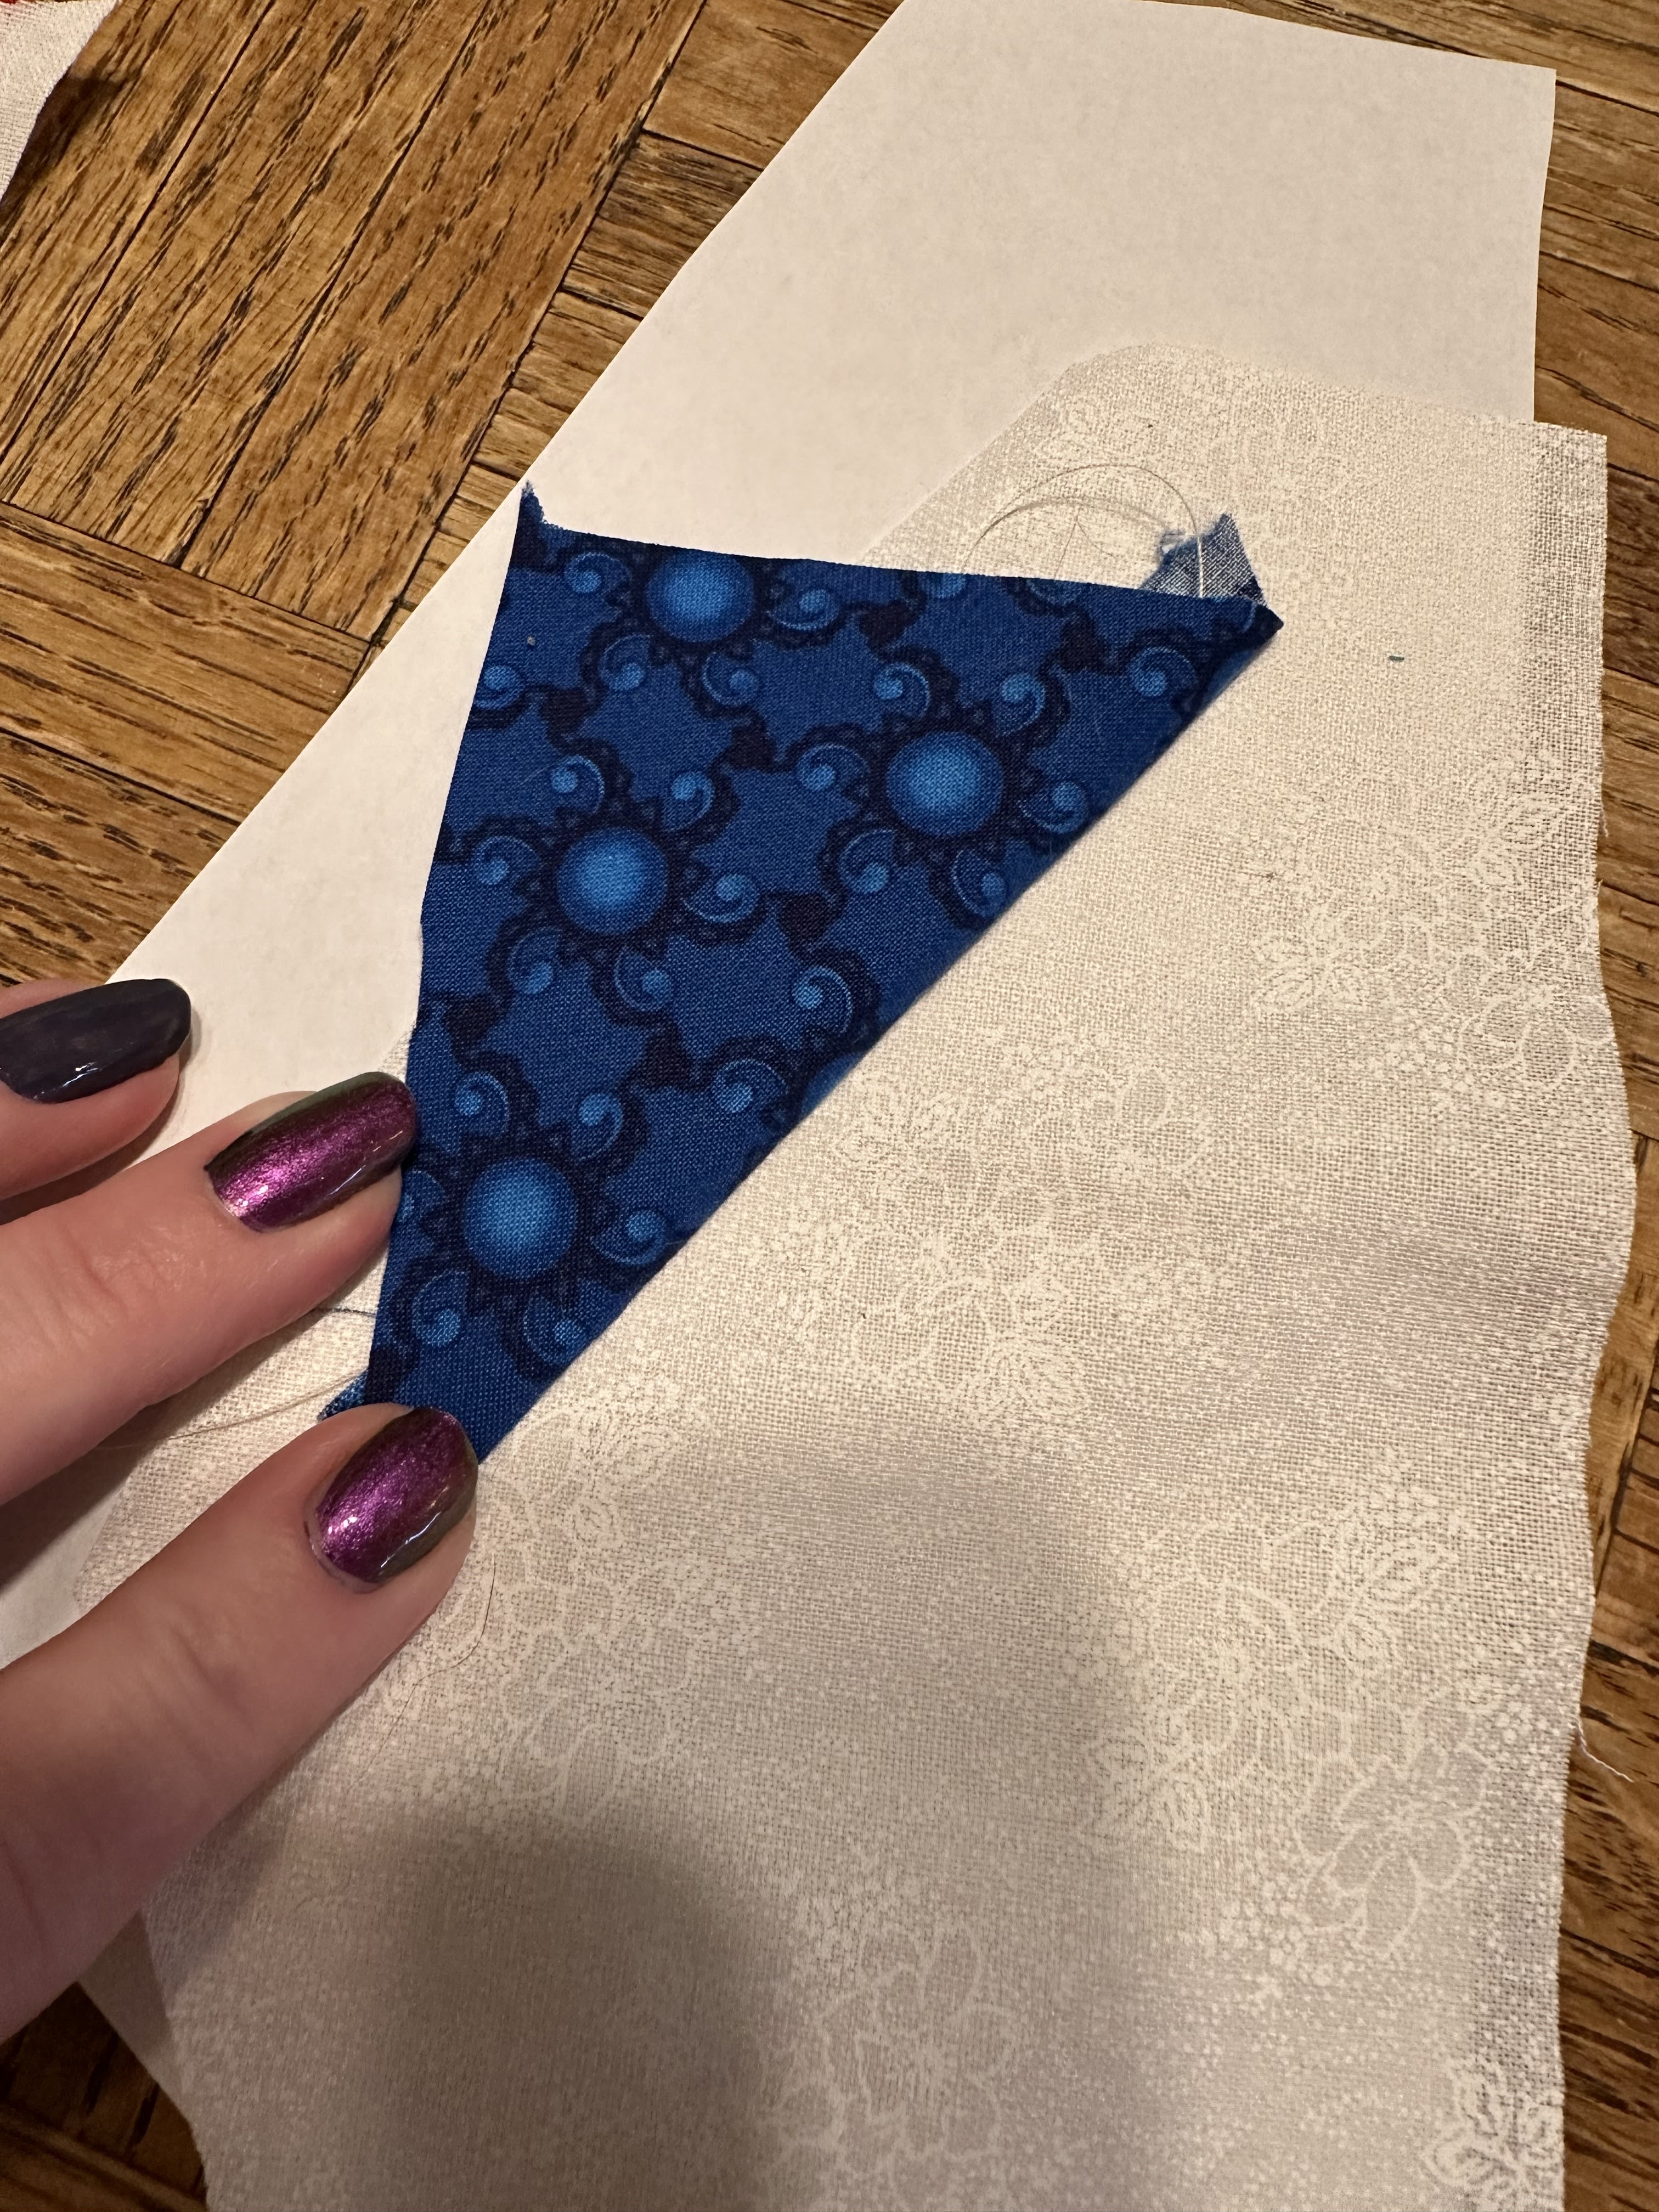


Another view.  Make sure your fabric covers the intended space, hold up to the light to check if needed.

Here's the pin along the line that I'm sewing.  All the right sides are facing here.

Folding along that sewing line.

Before releasing the seam 


After releasing the seam / folded part.  Take out the pin from the right side of the paper to release the folded bit again.

Continue with the other pieces for the unit you're working on.
Trim away the excess, I think I shouldn't have cut the paper exactly to size instead of a rough cut.  

How it will look when all the units are done from the right side of the paper

And what it looks like from the right side of the fabric.

Wednesday, May 28, 2025

Baby girl quilt

 Good ole X es and Crosses.    I used a new to me product, a water soluble printable stabilizer.   I didn't want to free hand draw 20 flowers with washable marker.  Life saver!


Wednesday, March 5, 2025

A niece quilt

My brain wanted to remind me of all the baby quilts I’ve made.   This is one i haven’t posted before. Flying geese units rotated on edge. All stash (well not the back).  


Saturday, May 29, 2021

Really behind


 I’ve got two projects running right now.  I ran out of supplies so I’ve moved to another.  This one is for me and probably will be used as fabric art as opposed to an actual quilt.  

Thursday, April 30, 2015

Finished gift


I got it put in the frame a few days before we left for our trip.   I'm very happy with the way it turned out.   I also think I'm done with French knots for a while.  


Sunday, April 5, 2015

Auction quilt, done


I love grabbing quilts from the dryer after their first wash.  This time was not a let down.   


Tuesday, March 31, 2015

And a wedding gift


Another WIP.  A wedding gift for my husband's cousin.  It might get done on the plane ride to the wedding.  *Fingers crossed*  

Another idea from Pinterest.  I'm going to add their initials to the middle of the tree and depending on how much time I've got left, I might add some texture to the tree branches and trunk.  It'll go inside an 11 X 7 picture frame.  

The red circle I drew is a new quilting find.  It's a Pilot erasable gel pen.  The marks go away with a warm iron, great for quilters.  It does retain a white line after you use a warm iron and after you put it in the cold (I experimented at home with scraps in the freezer) but once you wash it, the white ghost mark doesn't come back.  I'm not going to wash this project but possibly just wet and blot the areas where I added the pen marks just to be safe.

Smaller baby hood towels

Since D asked, here's the tutorial for the baby hooded towels.

Monday, March 30, 2015

Humane Society auction quilt

Last year after the auction for a local humane society fundraiser, I mentioned to my dad, one of their volunteers that I would provide something for the auction.  For a while there, I wasn't sure if it was going to happen or not because the person who organized it last year has since left the position.  I made the quilt top from scraps and then kinda just sat on it for a while. 

I guess it's appropriate that it's cat approved seeing where it's going to end up.

I fixed it after Ramses stepped all over it.


And then done.
I added a border and called it a good size for a baby quilt.

Then all of the sudden the auction was back on and I have a deadline.  It needs to be done by April 10th now.  Ack!  
This was the progress after the better part of a Sunday.  I filled and emptied an entire bobbin and then had to call it quits for the day.  I did a little more last night as well before I figured out that one of the white fabrics is MUCH thicker than the others.  It keeps breaking the top thread despite me changing my needle size (I need to make a post about needle sizes after I do some proper research.  After consulting my quilting buddy, I'm going to stick with 70/10 for piecing but 90/14 for quilting and binding).
The inside of the quilt is a loopy overlapping stipple.  The border is going to have larger figure 8's.


Sunday, March 29, 2015

Hooded towels

I've made baby towels before but my kids wanted bigger kid hooded towels.  The pattern I used before wouldn't work for bigger kids since it doubled up the hand towel that made the hood.  That made it way too small for their now school aged heads.  A little thinking and testing before I went to cutting and I came up with this idea.

What you'll need,
A bath towel
A hand towel
Pins
Scissors
Ruler
Marking pen or pencil
Sewing machine


First cut off those pesky outside bands off the short sides.  They are really really tough to sew through.  It's not good when you have to sew them into seams.

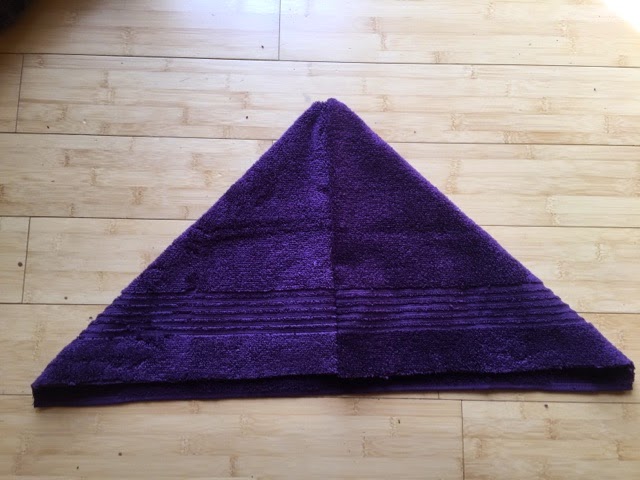
Fold the two now cut sides together and pin.  I used my favorite marking device, a dress makers chalk wheel and marked in two inches from the edge.  Sew along this line and then

Trim the excess near the edge, leaving 1/4 to 1/2 in seam.


Open up your hand towel,  The seam you just made in in the middle vertically here.


(Pretend you're ignoring all the fuzz that comes off onto the floor as well)
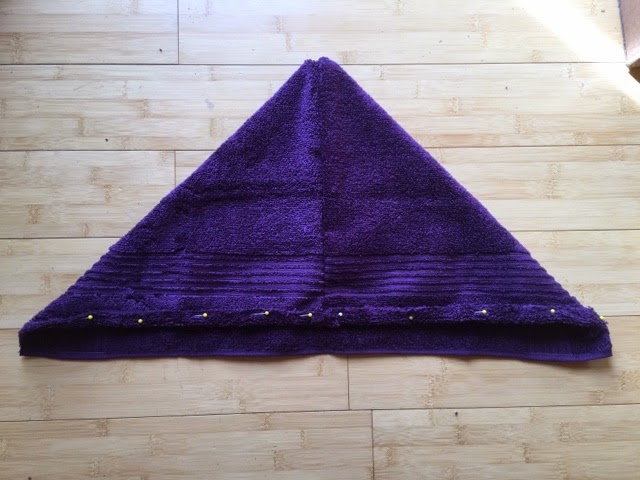
Pin one edge up about 1/2 an inch or so.  The inside of the towel and the seam is showing at the bottom there.   Sew in the middle of your turned edge.
Find the center of larger towel and use a pin to mark it


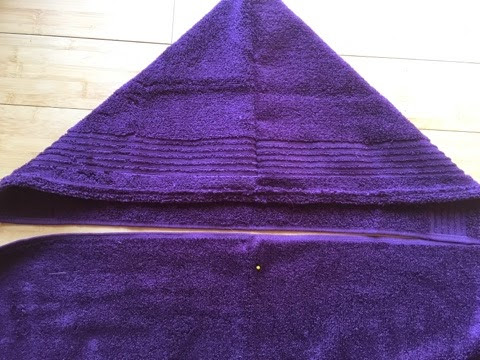
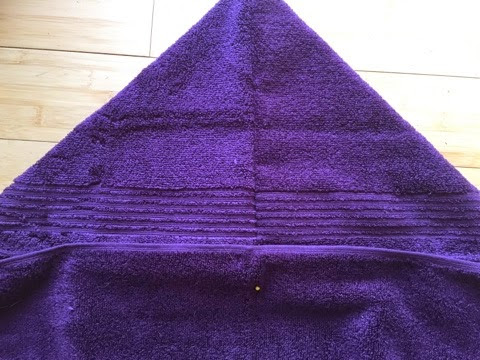
Lay your hand towel hood with the sewn edge on top (the raw unfinished seam is still showing at the bottom, the same orientation as above) and match up your middle seams placing the larger towel on top of the hood.


Sew along the band of the larger towel all down the length of the hood.  This will enclose the edge you flipped up on the hood.

The kids love their towels and now I'm trying to figure out how to make adult sized hooded towels as well.  I'll report back later on those.

More sewing and more projects coming up.