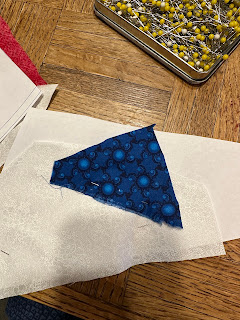
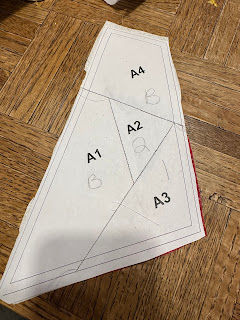
Put the wrong side of the fabric on the wrong side of the paper, making sure all of the area you are sewing is covered by both pieces of fabric. It's better to have more than less fabric here, you can always trim away.
From the right side of the paper, put one or two pins along the line where you'll be sewing.
Flip your project back to see the right sides of the fabric.
Flip over the blue piece here, along the line that you've pinned.
Place another pin to keep this in place and then carefully remove the pins on the right side, and releasing the folded fabric to make it flat, adding more pins if needed.
Turn over and sew on the side, securing the stitches if it's in the middle of the block, back stitch if it's on an edge.
Trim away the extra fabric by folding the paper away to a 1/4 inch seam.
After you trim away the excess, fold the fabric back so that the right sides are showing and then press the seam to one side (to the darker fabric is preferred)

Another view. Make sure your fabric covers the intended space, hold up to the light to check if needed.
Here's the pin along the line that I'm sewing. All the right sides are facing here.
Folding along that sewing line.
Before releasing the seam
After releasing the seam / folded part. Take out the pin from the right side of the paper to release the folded bit again.
Continue with the other pieces for the unit you're working on.
Trim away the excess, I think I shouldn't have cut the paper exactly to size instead of a rough cut.
How it will look when all the units are done from the right side of the paper
And what it looks like from the right side of the fabric.


